Mac Merge Itunes Libraries
Aug 08, 2019 When you've subscribed to Apple Music and want to access it from more than one device, it works best when you have iCloud Music Library turned on for all supported devices you want to use Apple Music with, but that doesn't mean you have to use iCloud Music Library with all of your devices. Seems a few members of our forums find merging iTunes libraries a little confusing. For example, one Edw tells a tale where his sister has two Windows computers.
When you've subscribed to Apple Music and want to access it from more than one device, it works best when you have iCloud Music Library turned on for all supported devices you want to use Apple Music with, but that doesn't mean you have to use iCloud Music Library with all of your devices. If, for any reason, you want to use Apple Music, but not iCloud Music Library, you have the freedom to choose.
Why wouldn't I use iCloud Music Library with Apple Music?
One of the biggest reasons some people may not want to enable iCloud Music Library is Apple's 100,000 song limit. If you have more music than that, you won't be able to fit your entire collection in the cloud.
Another reason, and probably the one that evokes the most fear of using iCloud Music Library, is that some people have very organized and meticulously tagged metadata that they don't want Apple's iTunes Match to mess up.
Whatever the reason, when you turn off, or if you never turn on iCloud Music Library, you can still use Apple Music, just with some limitations.
What happens when you don't use iTunes Music Library?
When you disable iTunes Music Library on *all your devices, this is what happens with Apple Music and your personal collection:
- You can't stream music from your Mac's music library to your iPhone, iPad, or other Macs when outside your home wi-fi network.
- You can't download Apple Music content and sync it between devices. You can't access Apple Music offline either.
- If you want to sync your local music library from your Mac to another device, you'll have to do so manually by connecting your device to your Mac and transferring it.
What if I want to use iCloud Music Library on some devices, but not others?
It's so easy to turn iCloud Music Library on and off (though it may take a long time to sync), that you can decide that you only want to share your music in iCloud on just your iPod but never your iPhone, or something similar.
If you choose not to enable iCloud Music Library on one or more devices, even though you have it enabled on your Mac, it won't affect what happens to devices that have it enabled. Your Apple Music activities also won't have any effect on the devices that don't have iCloud Music Library enabled.
Any songs, albums, or playlists you have saved from Apple Music won't be synced with devices without iCloud Music Library turned on, even if you've downloaded them onto your Mac.
How to disable iCloud Music Library
On iPhone, iPad, and iPod Touch
- Launch the Settings app.
- Tap Music.
Tap to turn off iCloud Music Library.
If you have been using Apple Music on your device, you'll receive a warning that any Apple Music tracks you've downloaded will be disabled.
On Mac
- Launch iTunes.
- With iTunes selected, click on iTunes in the app menu in the upper-left corner of the screen.
- Click on Preferences.
- Select the General tab.
Tick the box for iCloud Music Library.
If you have iCloud Music Library enabled on any device, and want to disable it on your Mac, you'll have to first disable it on those connected devices or the option to make changes will be grayed out on your Mac.
Any questions?
Do you have any questions about what happens when you disable iCloud Music Library while using Apple Music? Put them in the comments and we'll help you out.
A little something to go with your Apple Music
AirPods(From $159 at Apple)

The smallest headphones with the biggest features. You can enjoy streaming music, making calls, and asking Siri for help.
Wonderboom 2($100 at Apple)
Portable size with a booming sound. The Wonderboom 2 is a great travel companion and is even water resistant.
Seagate Backup Slim(From $55 at Amazon)
Make sure to always back up your music collection before you disable iCloud Music Library with an external backup drive.
Sweet Music
Apple Music
We may earn a commission for purchases using our links. Learn more.
More Apple TV+ contentMartin Scorsese's next movie might come to Apple TV+ after Paramount walked
Spiraling costs have put Paramount off Scorcese's next gig and Apple TV+ is one potential suitor. Netflix is said to be another potential avenue.
To combine Photos libraries, open the source library and export the photos and videos that you want to keep. Then open the destination library (the one that you want to use as your main library) and import the photos and videos.
2) Select the main library from the list of available image libraries. 3) In Preferences, select the General tab. Make sure the library is the System Photo Library. 4) In Preferences, select the iCloud tab. Place a checkmark in the iCloud Photo Library box. Mar 18, 2020 Here's how to open one of the multiple photo libraries that you might have on your Mac or on a connected external drive: Press and hold the Option key as you open the Photos app. Select the library that you want to open, then click Choose Library. Photos uses this library until you open a different one using the same steps. 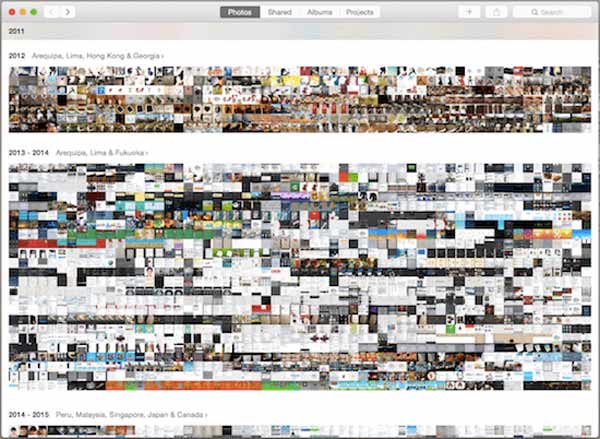 Christoph Stork’s photo libraries are overflowing. He owns a MacBook Pro with a 750GB drive, but has an iPhoto library that weighs in at 190GB and a Photos library that takes up 250GB.
Choose a photo library
Here's how to open one of the multiple photo libraries that you might have on your Mac or on a connected external drive:
- Press and hold the Option key as you open the Photos app.
- Select the library that you want to open, then click Choose Library.
Icloud photo library not syncing macbook. Photos uses this library until you open a different one using the same steps.
Export photos and videos from the source library
Open the source library, then decide whether you want to export your files as unmodified originals or edited versions:
Edited versions retain their edits when you import them. The advantage is that you don't have to recreate any edits; however, these files become the destination library's originals. This means that you can't revert to their earliest pre-import version.
Unmodified originals don't show any edits that you made when they were in the source library. This gives you flexibility for later editing, but recreating your edits might take substantial work.
How to export edited versions
- In the Photos app, select the photos and videos that you want to export. To select multiple items, press and hold the Command key while you click. To select a group of items in order, click the first one, then press and hold the Shift key while you click the last one. This selects all of the items between the two that you clicked.
- Choose File > Export > Export [number].
- An export dialog appears.
- In the Photos section, set Photo Kind to JPEG, TIFF, or PNG. JPEG recompresses your photos, which may result in smaller file sizes. TIFF and PNG files are higher fidelity and may result in larger file sizes.
- In the Videos section, choose a Movie Quality setting. This section appears only if your selected items include videos.
- In the Info section, select the checkboxes if you want to preserve metadata and location data in the exported files.
- In the File Naming section, set File Name to Use File Name and set Subfolder Format to either Moment Name or None. Moment Name creates a subfolder for each Moment that's represented in your selected items. This is useful if you'd like to create an Album in the destination library for each Moment. The None option exports all of the files directly into the destination folder.
- Click Export. A Finder dialog appears.
- Navigate to the location where you want to save the files, such as the Desktop or an external drive. Click New Folder if you create a new folder for your exported items.
- Click Export.
How to export unmodified originals
- In the Photos app, then select the photos and videos that you want to export. To select multiple items, press and hold the Command key while you click. To select a group of items in order, click the first one, then press and hold the Shift key while you click the last one. This selects all of the items between the two that you clicked.
- Choose File > Export > Export Unmodified Original.
- An export dialog appears.
- If your photos include IPTC metadata (such as titles or keywords) that you want to keep, select the Export IPTC as XMP checkbox.
- Leave the File Name setting on Use File Name.
- Next to Subfolder Format, choose Moment Name or None. Moment Name creates a subfolder for each Moment that's represented in your selected items. This is useful if you'd like to create an Album in the destination library for each Moment. The None option exports all of the files directly into the destination folder.
- Click Export. A Finder dialog appears.
- Navigate to the location where you want to save the files, such as the Desktop or an external drive. Click New Folder if you create a new folder for your exported items.
- Click Export Originals.
How to import photos and videos into the destination library
Open the destination library, then drag the folder that contains your exported items into the main area that shows your other photos and videos. When a green plus sign appears on your pointer, you can release the folder.
The photos in the folder are sorted into Moments based on their creation dates and locations. The videos are sorted based on the date you exported them from the source library.
If you created subfolders when you exported the items and you want to create an Album for each subfolder, follow these steps:
- In the Finder, open a subfolder.
- Select all of the photos and videos within the subfolder.
- Drag the items onto My Albums in the Photos sidebar.
- Name the Album in the highlighted text box that appears in the sidebar.
- Repeat for each subfolder.
Save space by deleting the source library
Mac Merge Itunes Libraries Online
If you're sure that you've exported all of the photos and videos that you want to keep from the source library, you can delete it to save disk space on your Mac.
First, open the Finder and find the source library that you want to delete. By default, photo libraries are stored in your Pictures folder. If you can't find the library, follow the steps to choose a library; the path to the selected library's location appears in the Choose Library window.
How To Merge Itunes Libraries
Next, move the source library to the Trash. Then choose Finder > Empty Trash to permanently delete the files.